
how to use a heat gun to remove paint comes down to three things: controlling heat, controlling airflow and fumes, and working in small, predictable sections so you do not scorch the surface or spread dust.
If you have ever tried scraping paint cold, you already know the pain, it chips, it clogs blades, and it can take forever. Heat can make the job dramatically faster, but it also adds real safety risks like burns, fire, and potentially hazardous fumes depending on the paint and substrate.
This guide walks through the decisions that usually trip people up, which nozzle to use, how hot is “hot enough,” what to watch for on wood vs metal, plus a simple checklist to decide if a heat gun is even the right tool for your project.
When a heat gun is the right tool (and when it is not)
A heat gun works best when you can soften paint and lift it in sheets. That usually means older trim, doors, window sashes, and metal railings where chemical strippers feel messy or slow.
It is a poor fit when the work area traps heat or fumes, or when the substrate can be damaged easily. The biggest “no thanks” situations are tight cavities, unknown insulation behind walls, and areas with hidden wiring you cannot confirm.
- Good candidates: wood trim with multiple layers, solid doors, metal brackets, outdoor furniture, masonry where you can keep distance.
- Proceed carefully: window frames, detailed moldings, veneer, drywall near seams, surfaces with glue or laminate.
- Consider another method: flaking lead paint you cannot contain, near gas lines, inside cabinets with limited airflow, near dry debris that can ignite.
According to the U.S. Environmental Protection Agency (EPA), homes built before 1978 may contain lead-based paint, and renovation work can create hazardous lead dust. If your home falls in that range and you are unsure, testing and lead-safe practices matter more than speed.
Tools, PPE, and jobsite prep that keep you out of trouble
Most “heat gun accidents” are not about the tool, they come from rushing prep. Set yourself up so your hands do not have to improvise once paint starts softening.
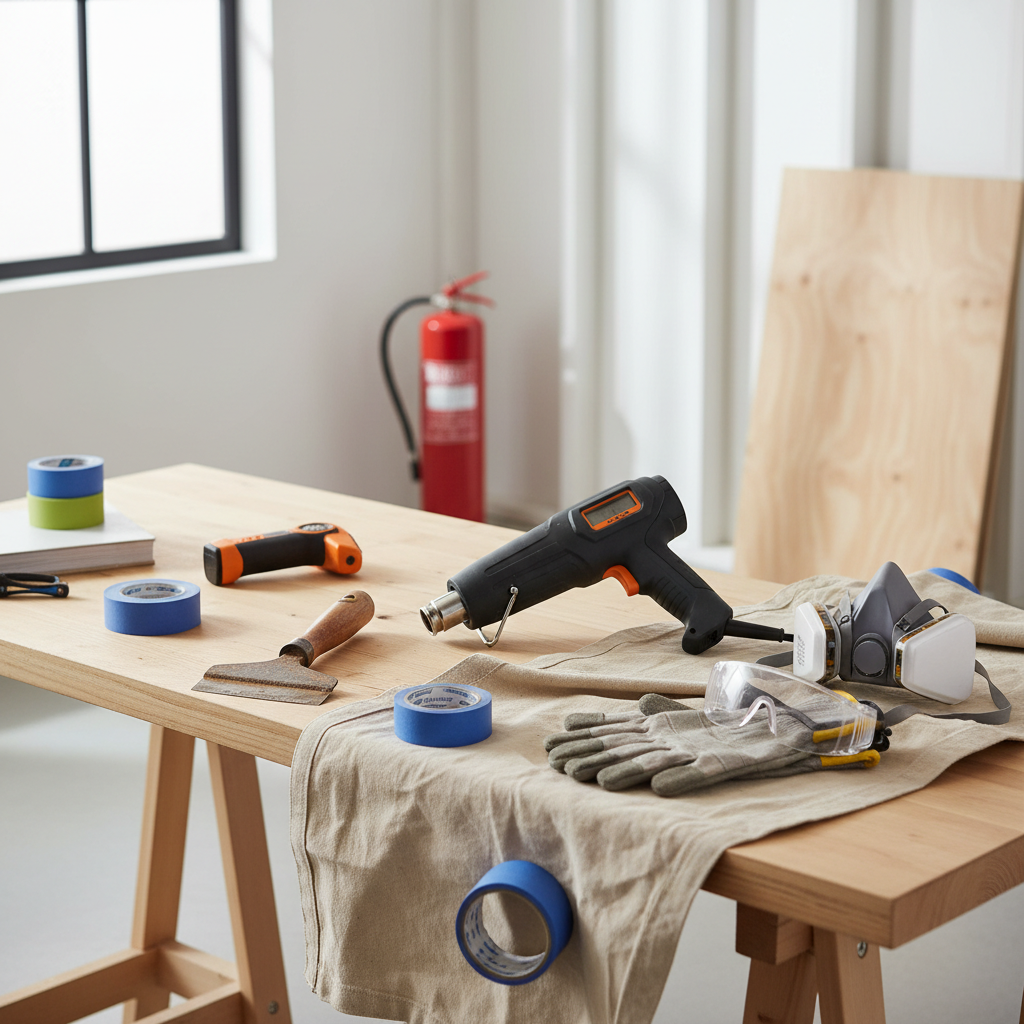
What to gather
- Heat gun with variable temperature and at least two airflow settings.
- Scrapers: a stiff putty knife, a contour scraper for profiles, and spare blades.
- Heat-resistant surface protection: metal sheet or flame-resistant mat for breaks.
- Painter’s tape and drop cloths to control chips, plus a trash bag or metal can for debris.
- Fire safety: a small ABC fire extinguisher nearby, and a spray bottle of water for spot control.
- Optional but helpful: infrared thermometer to learn your “sweet spot” without guessing.
PPE and ventilation
- Eye protection and heat-resistant gloves, paint can lift and flick.
- Respiratory protection often makes sense, especially indoors or with unknown coatings. According to OSHA, respirator selection should match the hazard and be used correctly; if you suspect lead or other hazardous dust, consider getting professional guidance.
- Ventilation: open windows, use a fan to move air out, and avoid pushing fumes deeper into the home.
Key point: treat softened paint like contamination, not confetti. Chips and dust travel, and cleanup becomes the hidden half of the project.
Quick self-check: choose your temperature and approach
Before you plug anything in, answer these. It takes two minutes and saves you from scorching wood or melting caulk.
- Surface: solid wood, veneer, metal, masonry, or drywall?
- Paint type: unknown, latex, oil, or very old layers?
- Detail level: flat boards or ornate profiles?
- Nearby risks: glass, weatherstripping, dry rot, insulation, wires, or accumulated dust?
- Work location: indoors with limited airflow, or outdoors?
If you cannot identify the coating and the home is older, consider testing for lead before proceeding. Many hardware stores sell test kits, and in higher-risk renovations it may be worth calling a certified lead-safe professional.
Step-by-step: how to use a heat gun to remove paint safely
The safest workflow is boring on purpose, heat a small area, scrape while soft, move on. If you try to heat a huge section “to save time,” you usually end up reheating, scorching, or losing control of the edge.
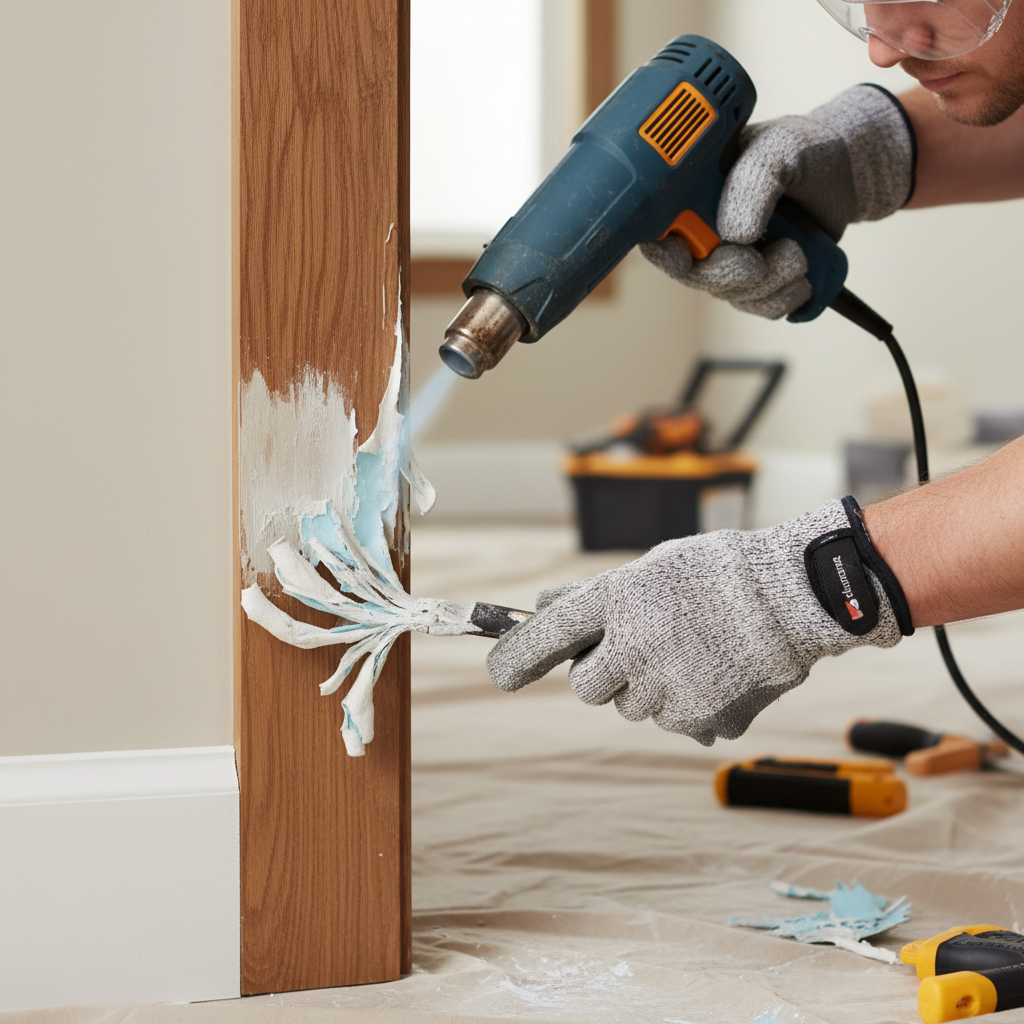
1) Set temperature and airflow
- Start lower than you think, many projects work in the 500–800°F range, but it varies by tool and coating.
- Use lower airflow for control on trim, higher airflow for larger flat surfaces.
2) Hold the gun at a controlled distance
- Typical starting distance is 2–3 inches from the surface.
- Keep the nozzle moving in small circles or slow passes, do not “park” the heat.
3) Heat a small section and watch for the cue
- Work areas about 6–12 inches wide.
- You want paint to soften and blister slightly, not smoke or turn black.
4) Scrape with the grain and keep the blade sharp
- Scrape at a low angle, let heat do the work.
- Wipe the blade frequently so you do not drag goo back onto the surface.
5) Deal with stubborn layers without overheating
- Reheat briefly rather than cranking temperature.
- On ornate profiles, switch to a contour scraper and accept smaller bites.
6) Pause safely
- When you stop, set the heat gun on its stand or a heat-safe surface.
- Keep the nozzle away from drop cloths, sawdust, and anything that can smolder.
Practical rule: if you smell scorching wood, you are already too hot or too slow. Back off temperature, increase distance, and keep the gun moving.
Surface-specific tips (wood, metal, drywall, and around glass)
People get frustrated because they use one technique everywhere. Surfaces react differently to heat, and your goal shifts from “maximum lift” to “minimum damage.”
Wood trim and doors
- Favor lower temps and patience, wood burns before you realize it.
- Keep a scraper edge tuned; a dull blade invites gouges.
- On resinous wood, sticky paint can smear, quick reheats often help more than extra heat.
Metal railings and hardware
- Metal conducts heat, so adjacent areas can become hot fast, watch your hands and nearby surfaces.
- After scraping, a wire brush can help, but it can throw debris, eye protection matters.
Drywall and interior walls
- Use caution, paper facing and joint compound can blister or crumble.
- If paint is not lifting cleanly, switching to chemical stripper or sanding might be less destructive.
Near window glass
- Avoid directing high heat at glass, thermal stress can crack panes, especially older glass.
- Use a shield like a putty knife blade between heat and glass, and work slowly.
Common mistakes that make the job slower (or unsafe)
- Overheating to “speed it up”: you get smoke, scorch marks, and gummy cleanup.
- Ignoring lead risk: if the paint is lead-based, heat and scraping can create hazardous dust and chips that spread.
- Skipping ventilation: many coatings release unpleasant fumes when heated, and indoors that can build fast.
- Using the wrong scraper: forcing a flat blade into a profile damages edges and still leaves paint.
- Piling debris on drop cloths: hot chips can smolder, collect waste in a metal container when possible.
Cleanup, finishing, and what to do after the paint comes off
Once the bulk paint lifts, you usually still have residue. That is normal, the finish step is where the surface starts looking “right.”
Cleanup basics
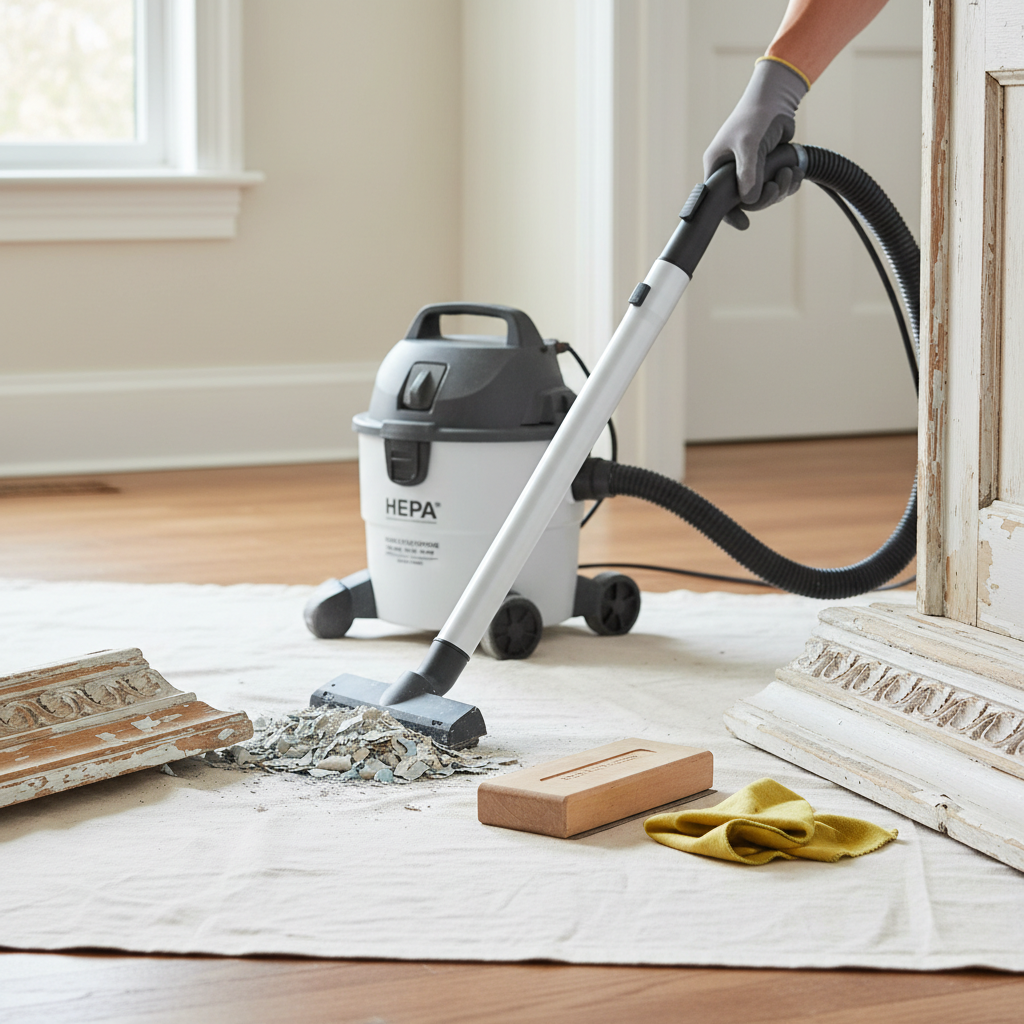
- Let debris cool, then bag it. Avoid sweeping aggressively, it can kick up dust.
- A HEPA vacuum is often a better choice than a standard vac when dust is a concern.
- Wipe surfaces with a damp cloth if appropriate for the substrate, then dispose of cloths properly.
Surface prep for new paint
- Light sanding to smooth edges where layers transition.
- Spot-prime bare areas, especially on wood, to prevent flashing.
- Caulk gaps after prep, not before heating, heat can soften many caulks.
Temperature and technique cheat sheet (quick table)
Settings vary by brand and nozzle, so treat this as a starting point, not a promise.
| Surface | Typical approach | What to watch for |
|---|---|---|
| Solid wood trim | Lower heat, closer control, small sections | Scorching, gouges, softened caulk |
| Ornate molding | Moderate heat, contour scraper, slow pace | Overheating high points, missed pockets |
| Metal railings | Moderate to higher heat, firm scraping | Heat transfer to nearby areas, burns |
| Drywall | Very cautious, test spot first | Paper blistering, damaged joint compound |
| Near window glass | Low heat, use a shield, keep moving | Glass cracking from thermal stress |
When to stop and call a pro
There is no shame in pausing when the risk profile changes. A professional often becomes the cheaper option when safety containment or specialized repairs enter the picture.
- You suspect lead-based paint and cannot set up proper containment, or you have kids or pets in the space.
- The project sits next to electrical, gas, or hard-to-verify cavities where heat could create hazards.
- You see char marks, persistent smoke, or the substrate starts deteriorating.
- Historic trim, delicate veneer, or window restoration where mistakes cost more than careful help.
According to the EPA, lead-safe renovation practices reduce exposure risk, and in some situations certified professionals are recommended. If you are unsure, asking for a quick assessment can be a smart reset.
Conclusion: safe heat beats maximum heat
If you take one thing from this, let it be this, controlled heat and small sections make paint removal predictable. Most DIY frustration comes from pushing temperature too high and trying to cover too much area at once.
Pick a test spot, dial in the lowest setting that softens paint, and build a routine you can repeat without rushing. If the home might have older coatings, treat dust and chips with extra care, and consider professional input when the risk feels fuzzy.
FAQ
What is the safest temperature for removing paint with a heat gun?
There is not one universal number, but many people start in a moderate range and adjust based on how quickly the paint softens. The safest setting is usually the lowest temperature that lets you scrape cleanly without smoke or scorching.
Can I use a heat gun to remove paint from wood without burning it?
Yes, in many cases, but it takes control, keep the nozzle moving, work small sections, and scrape as soon as the paint softens. If you see darkening or smell scorch, back off heat and increase distance.
Is it okay to use a heat gun indoors?
It can be, but indoor work needs ventilation and a plan for dust and chips. If the coating is unknown or the home is older, consider lead risk and use containment, when in doubt, professional advice is worth it.
How do I know if the paint might contain lead?
In the U.S., homes built before 1978 are the main red flag. Testing kits exist, and for higher-stakes renovations you may want a certified inspector or lead-safe contractor, especially if children, pregnant people, or pets share the space.
Why is my paint turning gooey instead of scraping off?
That often happens when the paint is overheating or you are waiting too long before scraping. Try slightly lower heat, quicker passes, and scrape sooner, you want soft lift, not melted smear.
Should I sand after using a heat gun?
Usually yes, at least lightly, because edges between layers and small residue spots are common. Sanding also helps primer bond, but avoid aggressive sanding if you suspect hazardous coatings.
What should I do if I accidentally scorch the wood?
Stop heating that area, let it cool, then assess. Light scorch can sometimes sand out; deeper burns may need filler or replacement. If it is trim you care about, a pro refinisher can help you avoid making it worse.
If you are working through a whole room of trim or a stubborn door with lots of layers, a variable-temperature heat gun, sharp scrapers, and a simple containment setup can make the process feel manageable instead of chaotic. If you want a more hands-off route, a local paint removal or restoration pro can help you choose the safest method for your specific surface and paint history.